Translate

Saturday, 14 September 2013

Blue and glitter nails!

This design was very simple and easy to do, but I think it still looks very pretty. I started off trying to do a different design, well I tried a few different designs until I eventually got to this one, but none of the others were working for me. I think I was being a bit overly ambitious. I might try some of them again some other time, but I was getting very frustrated so I decided to settle for this easy one.
For this I used seventeen wave as my base colour, then got a glitter striper from Andrea Fullerton and just did flicks from the top of my nails. Easy as that! 

Thursday, 5 September 2013

Swirls!

For this design I used natural collection antique coral and Barry M nail art pen white. 
I started off by painting my nails antique coral and giving it a few moments to dry. Then I started to draw a spiral on my nail, I started the spirals at different points on different nails so all my nails could be different. I continued with the spirals until a little bit after they'd gone off the nail. Then I'd start another spiral somewhere else on the nail and follow the same procedure, making sure to stop the line at the other spiral so as to give the effect one was on top of the other. I repeated this until my nail was covered then finished off with my topcoat!

Wednesday, 4 September 2013

More Polka Dots and Flowers

I have another polka dot and flower design today, I did it quite a while ago, so I can't remember the polishes I used, but here it is....
I did a grey base with mint polka dots, then painted white flowers coming off the nails in a different place on each nail. I then painted the middle yellow, added pink polka dots to the petals and white polka dots to the yellow centre and finished off with a topcoat!

Sunday, 1 September 2013

Wedding Nails!

Today I went to wedding so I thought some nice pastel nails would be perfect for the occasion!
I ended up with this design
To get the watercolour effect that I used I started off by painting my nails 2 coats of Barry M Matt White, then let it dry completely. Then I took nails inc you're a peach and spitalfields and models own strawberry tart and placed big drops of them on my nail then took some cling film, placed it over my nail and pressed down over the cling film to spread the polish out. 

On my thumb I used the Andrea Fullerton nail art pen in black to draw a dream catcher and I used models own blueberry muffin and a medium sized dotting tool to do little beads on it.


On my index finger I just put a coat of beauty uk pinkabloo over the water colour effect.

On my middle finger used illamasqua smash and a striper to draw the stem, then blueberry muffin and a dotting tool for the petals and nails inc portobello market and a dotting tool for the middle.

On my ring finger I used a red, green and blue striper by rio and a glitter striper by Andrea Fullerton and just painted flicks starting for the top of my nail to create a sort of waterfall effect.

And on my little finger I didn't use the water colour technique because the design wasn't really showing up over it, so instead I painted it blueberry muffin and used the paisley design from my konad m60 plate with portobello market.


The jewellery I decided to pair with the nails.
 
The peacock ring and the diamond ring are from Claire's, the rest of the rings are from republic and the bracelet was a gift so I don't know where it's from!

A quick look at makeup, hair and outfit!


There's my make up and hair, I went quite light with the colours for my make up and added a bit of a curl to my hair.
Close up on my eye makeup I used a pearly colour all over my lid then added a light gold to the outer corners and my socket line. Then thinly lined them and used the benefit they're real mascara.

And that's the whole look put together!

Then in the evening we all went out to a hotel, so I had to switch up my outfit a bit and dramatise my makeup.
 I look a bit scary there...


I just added a dark brown to my eyes and flicks on my liner and lined my waterline, then put a dark lipstick on and gloss over it.


All my jewellery is from republic except the skull ring and bracelet which were both presents.

I just added a belt to my outfit and heeled dr martens with calf length black socks.

And that's the finished nighttime look!


Friday, 30 August 2013

Natural Collection, Seventeen, Barry M and Maybelline review.


Today I went to boots and bought these nail varnishes, so I thought I'd share my thoughts on them.

I'll start off with the natural collections. These polishes were quite cheap at £1.89 each, but they were on 3 for £5 so I only paid £5 for them all.

From left to right the colours are; antique coral, pink manicure and peach manicure


In the picture, I have 3 coats of antique coral although it probably could've done with having four coats. This nail varnish was a little thin, but wasn't terribly so and it's a very pretty colour, it looks a little more pastel in real life than in the picture.
The other two nail varnishes I had to use 6 coats! Which I wasn't too pleased about, but then it dawned on me... They're probably designed for french manicures, so I tried that out and they worked fine!

Pink manicure on the left and peach manicure on the right.

Now for the maybelline polishes, these were £2.99 each but they were on offer so I got 3 for the price of 2


From left to right the colours are; red grained, tanned and ready, turquoise temptation.


All these polishes say vintage leather, I assumed this meant they would have a leather effect, no where on the bottle does it say they're meant to and I can't seem to find these colours on the boots or maybelline website, so I don't know if they're meant to or not. They all have a matte finish and little shimmery bits which you can't see when they're on your nail, you can only see them when you're putting your nail varnish on or taking it off, so I'm not quite sure what they're there for. I was quite disappointed with these as I was expecting a leather look, but I don't know if these polishes are designed to do that, I will use these colours, but just as I would use any nail varnish, not for their leather looks.

And finally my seventeen and Barry M polishes! These are all £3.99 each, but my two seventeen polishes were on sale so I got them for £2.99 each instead!


The seventeen polishes are both from the nail effects graffiti range. The one on the right is bluetone and on the left is monochrome. The Barry M is key lime and is one of their gelly polishes.

It only took one coat of the key lime for it to be completely opaque (it was quite a thick coat though, maybe 2 thin coats). It's a lovely colour as well, very vibrant!
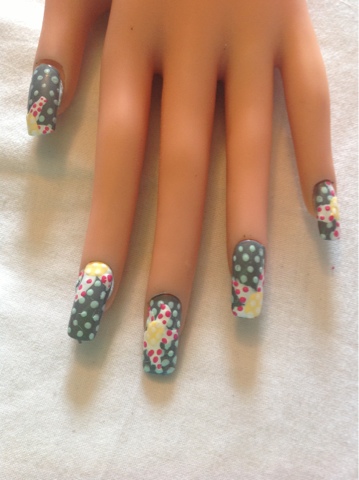
The two graffiti polishes are very good too! Just the right amount of little bits (not quite sure what to call them) come out and they're very pretty... Not sure pretty is the right word, but they look good! I tried out monochrome over my yin and yang mani and I loved how it turned out!


Wednesday, 28 August 2013

Yin and yang nails

This manicure is fairly simple to do, but I think looks really effective. It's a yin and yang symbol on the ring fingers and the rest are alternatively painted black and white with a pearl at the bottom.

To begin with I painted both my ring fingers white (easier to layer darker, more opaque colours over lighter colours than the other way round). Then I painted the rest of my nails alternatively black and white. Once I'd done that I painted the black half of the yin and yang. When you paint this make sure you start at the middle and end in the middle of your nail, if you don't it can be very easy to end up with a pretty straight line or the waves in the wrong places. Make sure there is only 2 well defined curves in the wave. 
Then I moved onto my other fingers, I got my black and white pearls and placed them on the bottom of the nails which were the opposite colour to the pearl. 
Everyone has their own method of doing this, but i find the easiest way is to put a blob of clear nail varnish or if your quick you can just put it on the colour before it dries, but that can get a bit messy sometimes. Then use a dotting tool with a drop of the clear nails varnish on the end to pick up and place the pearl. You can put nail glue on the nail instead of the clear polish if you want it to last longer, but I find it messy and I never want to keep my design on long enough for it to matter.
Once that's done use a medium or large dotting tool, depending on how long your nails are to dot white polish on the black side and black polish on the white side. 
Give it a little while while to dry... You don't want your design to smear then put on you top coat. Try to make it quite thick over the pearls to hold them on better!


Tuesday, 27 August 2013

Flowers and polkadots

 This design is a flowers and polkadots design that I did on my friend's nails. These nails are inspired from a Wah design and I did them to enter into a competition on instagram. The theme for the competition is flowers and polkadots and it's hosted by nubbinnails. If you want to have a look at my instagram so you can see some of my older designs my username is carysdoesnails.


For this design I used-
Barry M Matt White for the base

Models own Apple Pie for the polka dot background


Models own Strawberry Tart and Nails inc. You're a Peach for the flower


Illamasqua Smash for the leaves. I lost the top of the bottle quite a while ago... oops.


And Andrea Fullerton dot and flick in black for the detail.


To begin with I painted my friend's nails white.


That's her drying her nails with my monkey nail dryer.
 
Then I added small polkadots in apple pie 


Once I'd done that I put 1-2 blobs of Strawberry Tart and You're a Peach onto each nail.


Then I used Smash to add leaves.


And to finish off the look I outlined the flowers and leaves with the striper part of the dot and flick then used the pen to draw two curved lines inside each flower then completed the look with a topcoat.


The thumb smeared a little when I put the top coat on :(