Translate

Showing posts with label glitter. Show all posts

Tuesday, 4 March 2014

Rainbow nails

These are the nails that I had for my birthday! Rainbows, butterflies and a pot of gold on a light blue background with a gold glitter and clouds!

Wednesday, 5 February 2014

Valentine's Day Nails Kiss

I have a pictorial for this design!
1) Paint your nail white. I used Pinstripe White by NYC.
2) Using a black nail art pen or thin brush and black polish draw two half circles on either side of your nail so the almost meet in the middle. Draw two curved lines in the circles, a big one for the smile and a smaller one for the eye. Add eyelashes to one of the eyes to make it girly. I used my Barry m black nail art pen for this.
3) Add hair. For the boy I just used the same black nail art pen as before and drew on a couple of spikes. For the girl I chose to go blonde so I used nails inc. spitalfields and using the brush that came with the polish dabbed it on top of her head.
4) To add a bit of extra detail to the girl's hair I used my nail art pen again and just put some dashes through it. To finish off I used models own pink blush and a dotting tool to add a little heart between them so they look like they're kissing! 

Here's a picture of the rest of my nails I wore for this design. I just decorated them with glitter, caviar beads, pearls and a heart fimo. The glitter polish I used is Essie a cut above.

Tuesday, 31 December 2013

New years eve nails

Here's my design for New Year's Eve. The base is my favorite polish, it's Aztec by Accessorize. Then I used a gold striper from Andrea Fullerton to do flicks in circles for fireworks. Over that I used Barry M white nail art pen to write 2014 then went over the white with a blue striper from Andrea Fullerton. Then just to add a bit more sparkle I placed a few gems randomly over my nails to finish off!

Wednesday, 25 December 2013

Essie- a cut above

Merry Christmas! I've just opened my stocking and was very delighted to see the prettiest pink glitter polish I have ever seen! It's Essie A Cut Above and I just could not wait to try it. I decided to layer it over Accessorize Cinder Rose and add a little silver circle stud at the base of my nails. It was very easy to apply; the glitter went on very evenly, only took a bit of arranging to get it beautifully distributed over my nail and I didn't need to use that much of the polish to get a nice amount of glitter on my nails. And it's just SO pretty!

Thursday, 19 December 2013

Purple Glitter and Rhinestones

These nails are just frosted plum by gosh with a bit of extra glitter and sparkle! All I did was paint my nails and whilst they were still wet placed some chunky glitter on the base. Then added a blob of clear nail varnish over the glitter to secure the rhinestones. I then sealed it all in with my topcoat! Very simple and easy to do, but very pretty and sparkly!

Monday, 16 December 2013

Gosh Frosted Plum Reveiw

Gosh's Frosted Nail Laquer in Frosted Plum is an absolutely beautiful colour. It's a dark glittery purple polish with hints of gold in it. This polish is textured so it dries rough, it also dries to a matte finish and even after applying a topcoat is still quite matte. The opacity of this polish is very good, I found I only needed to apply one coat. If I hold it up to the light the tips go a tiny bit see though, but it'd be easily fixed with a second coat if it really bothered you, but I don't think it's needed.
Overall I am in love with this polish, it's so easy to work with and looks amazing. The only thing that would put me off wearing it is that I think these types of colours look best plain with no design on them, however I have done a simple design using this polish with glitter and rhinestones, which I will upload soon.

Friday, 29 November 2013

Lilac and glitter flowers

For this design I painted my nails lilac and then used a silver glitter nail art pen for the flowers. To do the flowers I started off by doing a dot in the middle to work from then drew four petals around the dot. I did a couple of these flowers on my accent nails and only one big flower coming off the nail in different positions on different nails for the rest of my nails.

Sunday, 10 November 2013

Union Jack Nails

For this design I used my  Maybelline vintage leather polishes in Turquoise Temptation and Red Grained. I used Red Grained on my ring finger and Turquoise Temptation on the rest of my nails. I also used 2 Andrea Fullerton stripers, a silver one and a glitter one. I used the glitter one on my ring finger and the silver one on the rest of my fingers. I used these to draw out the Union Jack then finished off with a topcoat. 

My silver striper is very old and dried up (I should really get a new one), so it's not left a great finish to this mani, very bumpy and uneven not nice and smooth like it should be.

 :(

Friday, 8 November 2013

Pink and gold studs

This design is very simple and easy. I just painted my nails in Milan by No. 7 then used a topcoat to secure on the gold studs (from eBay).

Thursday, 24 October 2013

Cupcakes Halloween Challenge: Classic Horror Character

I chose to do a ghost design for this mani-
 

For the base I used Illamasqua Raindrops, then went over it with 17 Bluechrome. To draw my ghost I just took a plain white and using the brush in the bottle painted the shape, pressing more heavily at the beginning then with less pressure towards the end to make the tail. I used Andrea Fullerton's Dot and Flick to draw the eyes and mouth. To write Boo I just very carefully used Barry M Nailart Pen in White.

The makeup look to go with these nails-


For this look I started off with a wash of a matte white eyeshadow all over my lids and upto my brow bone. I then intensified the white on my lid by adding more of the white, I also put some onto my waterline to brighten up my eyes a bit. Then I took a light blue and applied that on the outer half of my lid. Once that was done I used a dark/navy blue to go right into my crease and took it right to the inner corner of my eye and very carefully winged it out lightly, then once I was happy with it I went back in and built up the colour. For my mascara I used Bad Gal by Benefit because I wanted something quite pretty and subtle, nothing to dramatic. On my lips I have Money, Honey Dazzleglass by Mac and on my cheeks I have a pink blush by makeup essentials, which I can't find the name of. 


Wednesday, 2 October 2013

Purple and pearls

For this design I painted my nails a lilac color then sprinkled some pink glitter in the bottom corner of my nail whilst the polish was still wet. Then I took some different sized pearls and using clear polish (you could also use glue if you want them to last longer) randomly attached them to my nails over the glitter. Finally I secured the whole design with a top coat!

You might also notice that my nails have gone short :( lots of them had broken or split so I decided it was time for them to go. Hopefully they won't take too long to grow back!

Saturday, 14 September 2013

Blue and glitter nails!

This design was very simple and easy to do, but I think it still looks very pretty. I started off trying to do a different design, well I tried a few different designs until I eventually got to this one, but none of the others were working for me. I think I was being a bit overly ambitious. I might try some of them again some other time, but I was getting very frustrated so I decided to settle for this easy one.
For this I used seventeen wave as my base colour, then got a glitter striper from Andrea Fullerton and just did flicks from the top of my nails. Easy as that! 

Sunday, 1 September 2013

Wedding Nails!

Today I went to wedding so I thought some nice pastel nails would be perfect for the occasion!
I ended up with this design
To get the watercolour effect that I used I started off by painting my nails 2 coats of Barry M Matt White, then let it dry completely. Then I took nails inc you're a peach and spitalfields and models own strawberry tart and placed big drops of them on my nail then took some cling film, placed it over my nail and pressed down over the cling film to spread the polish out. 

On my thumb I used the Andrea Fullerton nail art pen in black to draw a dream catcher and I used models own blueberry muffin and a medium sized dotting tool to do little beads on it.


On my index finger I just put a coat of beauty uk pinkabloo over the water colour effect.

On my middle finger used illamasqua smash and a striper to draw the stem, then blueberry muffin and a dotting tool for the petals and nails inc portobello market and a dotting tool for the middle.

On my ring finger I used a red, green and blue striper by rio and a glitter striper by Andrea Fullerton and just painted flicks starting for the top of my nail to create a sort of waterfall effect.

And on my little finger I didn't use the water colour technique because the design wasn't really showing up over it, so instead I painted it blueberry muffin and used the paisley design from my konad m60 plate with portobello market.


The jewellery I decided to pair with the nails.
 
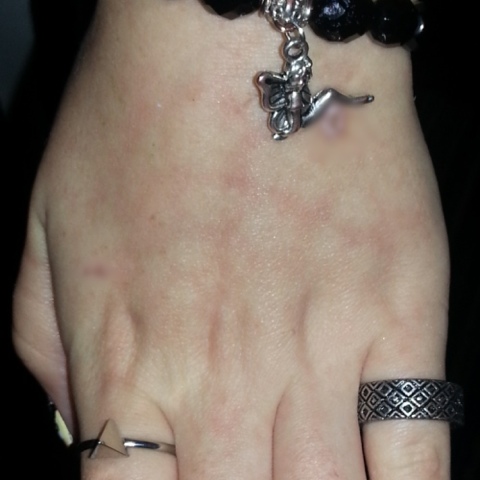
The peacock ring and the diamond ring are from Claire's, the rest of the rings are from republic and the bracelet was a gift so I don't know where it's from!

A quick look at makeup, hair and outfit!


There's my make up and hair, I went quite light with the colours for my make up and added a bit of a curl to my hair.
Close up on my eye makeup I used a pearly colour all over my lid then added a light gold to the outer corners and my socket line. Then thinly lined them and used the benefit they're real mascara.

And that's the whole look put together!

Then in the evening we all went out to a hotel, so I had to switch up my outfit a bit and dramatise my makeup.
 I look a bit scary there...


I just added a dark brown to my eyes and flicks on my liner and lined my waterline, then put a dark lipstick on and gloss over it.


All my jewellery is from republic except the skull ring and bracelet which were both presents.

I just added a belt to my outfit and heeled dr martens with calf length black socks.

And that's the finished nighttime look!